Painting light
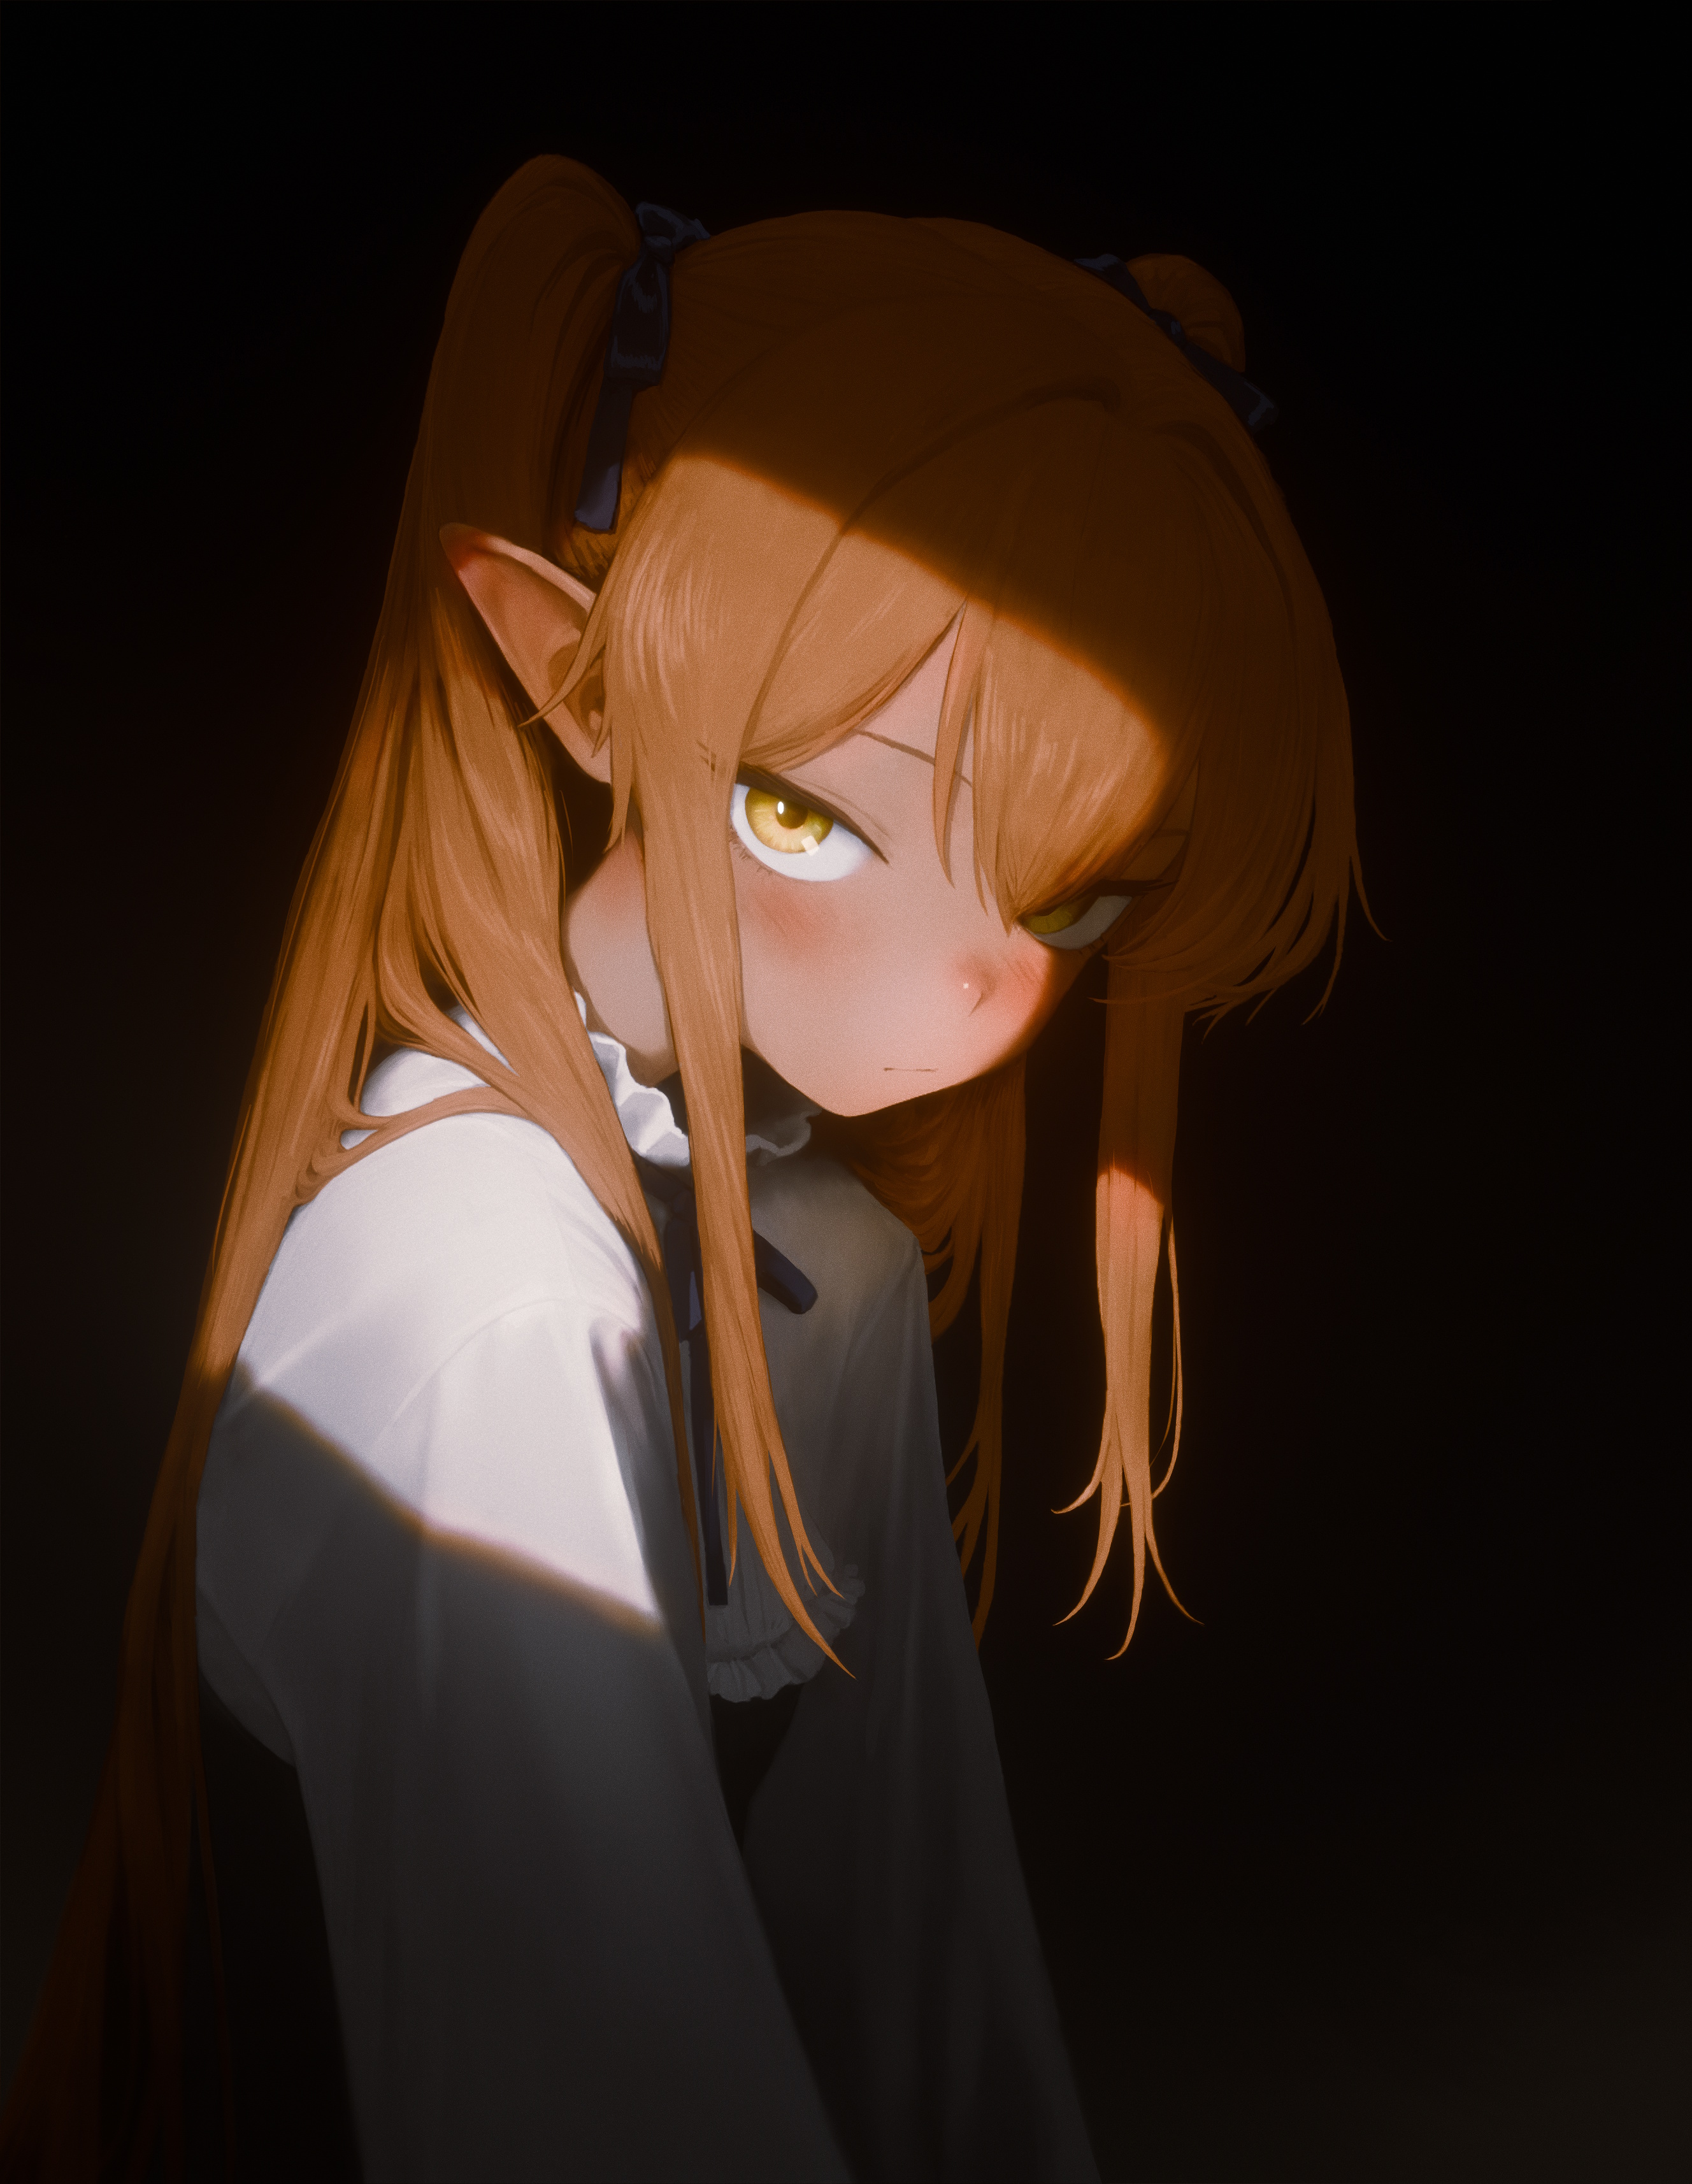
I painted this piece with a somewhat unusual workflow I've been testing out. In this post I will share some of my findings.
When painting digitally, we often use physical media as a metaphor: putting down paint on a canvas. However, this is not the only possible approach. What if we paint how light actually works?
Since I'm familiar with 3D rendering, I got the idea to set up a "pipeline" inside of the painting software that works in a similar way. I'm not necessarily interested in achieving photorealism here. The result can be stylized while going for a "cinematic" feel.
Color spaces
In the real world, light has a very large dynamic range, much larger than what your display can reproduce. Proper color management is an important ingredient in getting things to look natural. We want to work in a linear color space with high dynamic range (HDR). To get the final image, tonemapping is then applied to compress the colors from the scene to those that can actually be displayed.
While Krita has support for HDR, it does not come with built-in tonemapping. Luckily, Blender ships with an excellent set of color management tools, including its AgX tonemapping algorithm. It is designed to give a filmic look, and preserves highlights and colors very well.
Layers
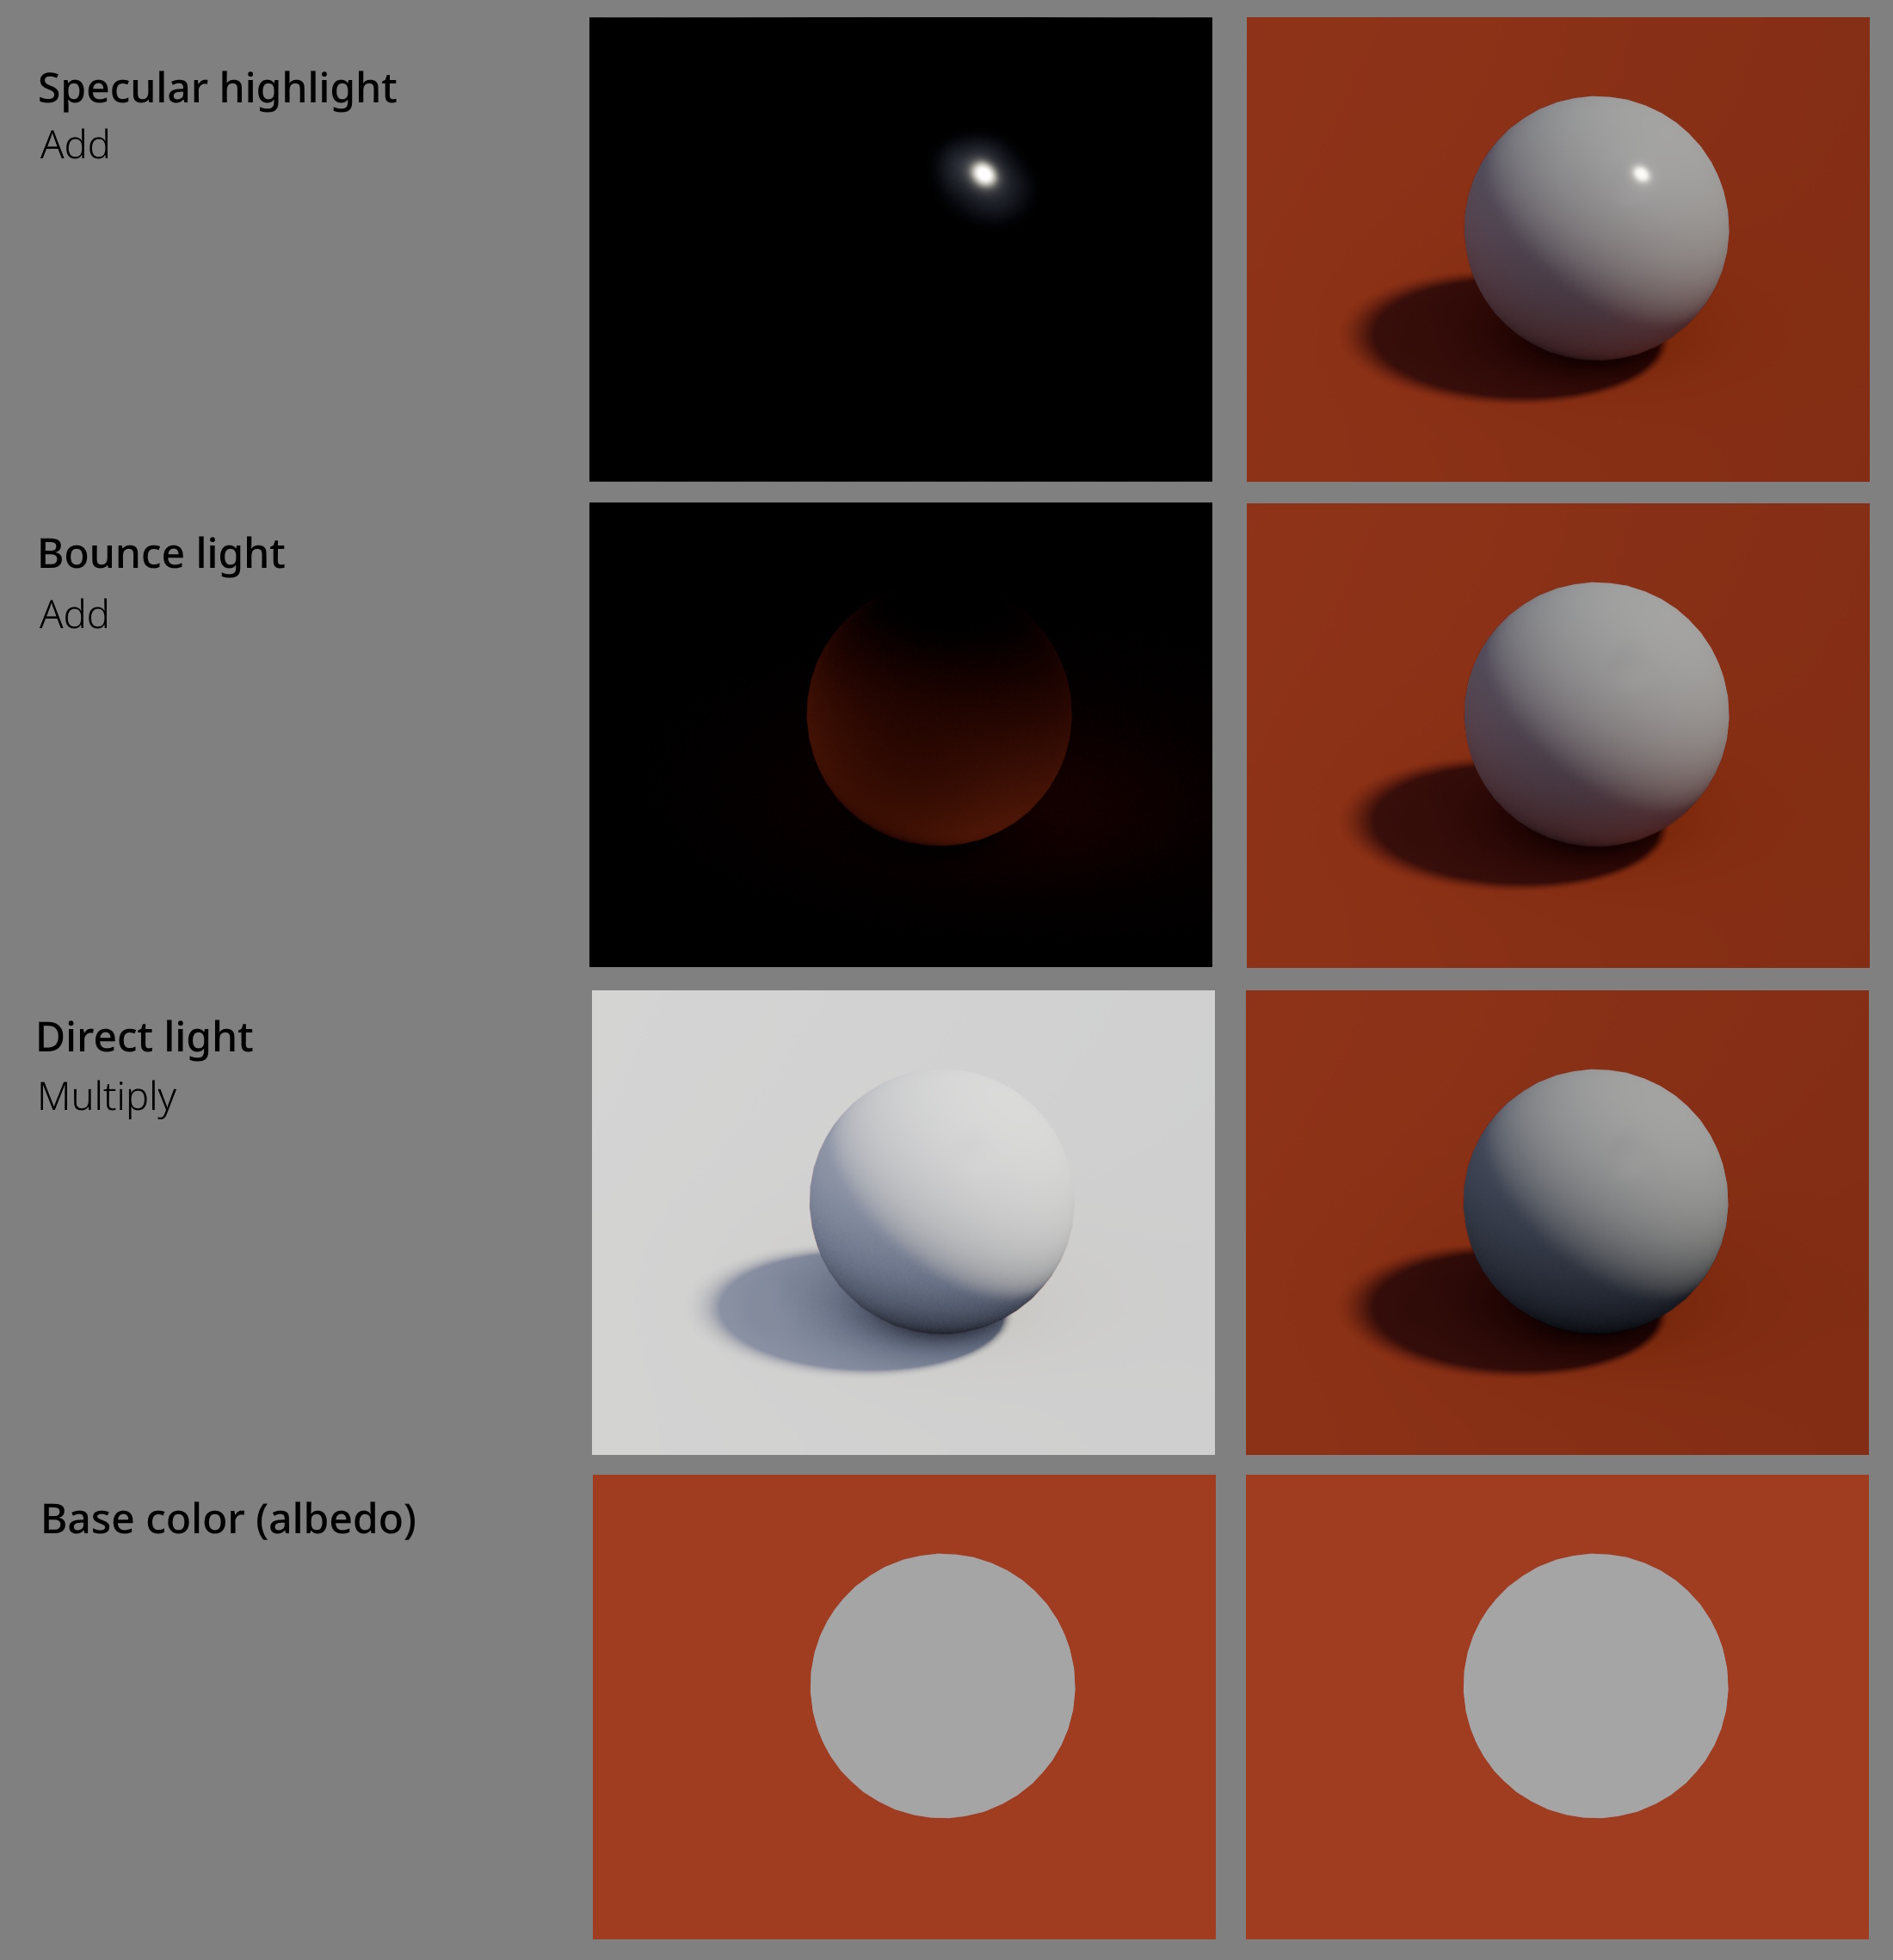
I tend to think of light as consisting of 4 different components.
- Albedo is the local color of the material. Starting from line art you can lasso and fill most of these quite quickly.
- The main diffuse light is on a multiply layer. If you have multiple lights they go on separate layers. This tends to darken the image so you will have to increase exposure to compensate.
- As light gets reflected from different objects, it adds some contribution to neighboring surfaces. Here you can see some subtle red light from the floor getting added to the grey.
- Shiny materials get an extra highlight layer for the reflected light. For non-metals the light simply adds, for metals the reflections need to be on a multiply layer instead, since they get tinted by the local color.
Breakdown
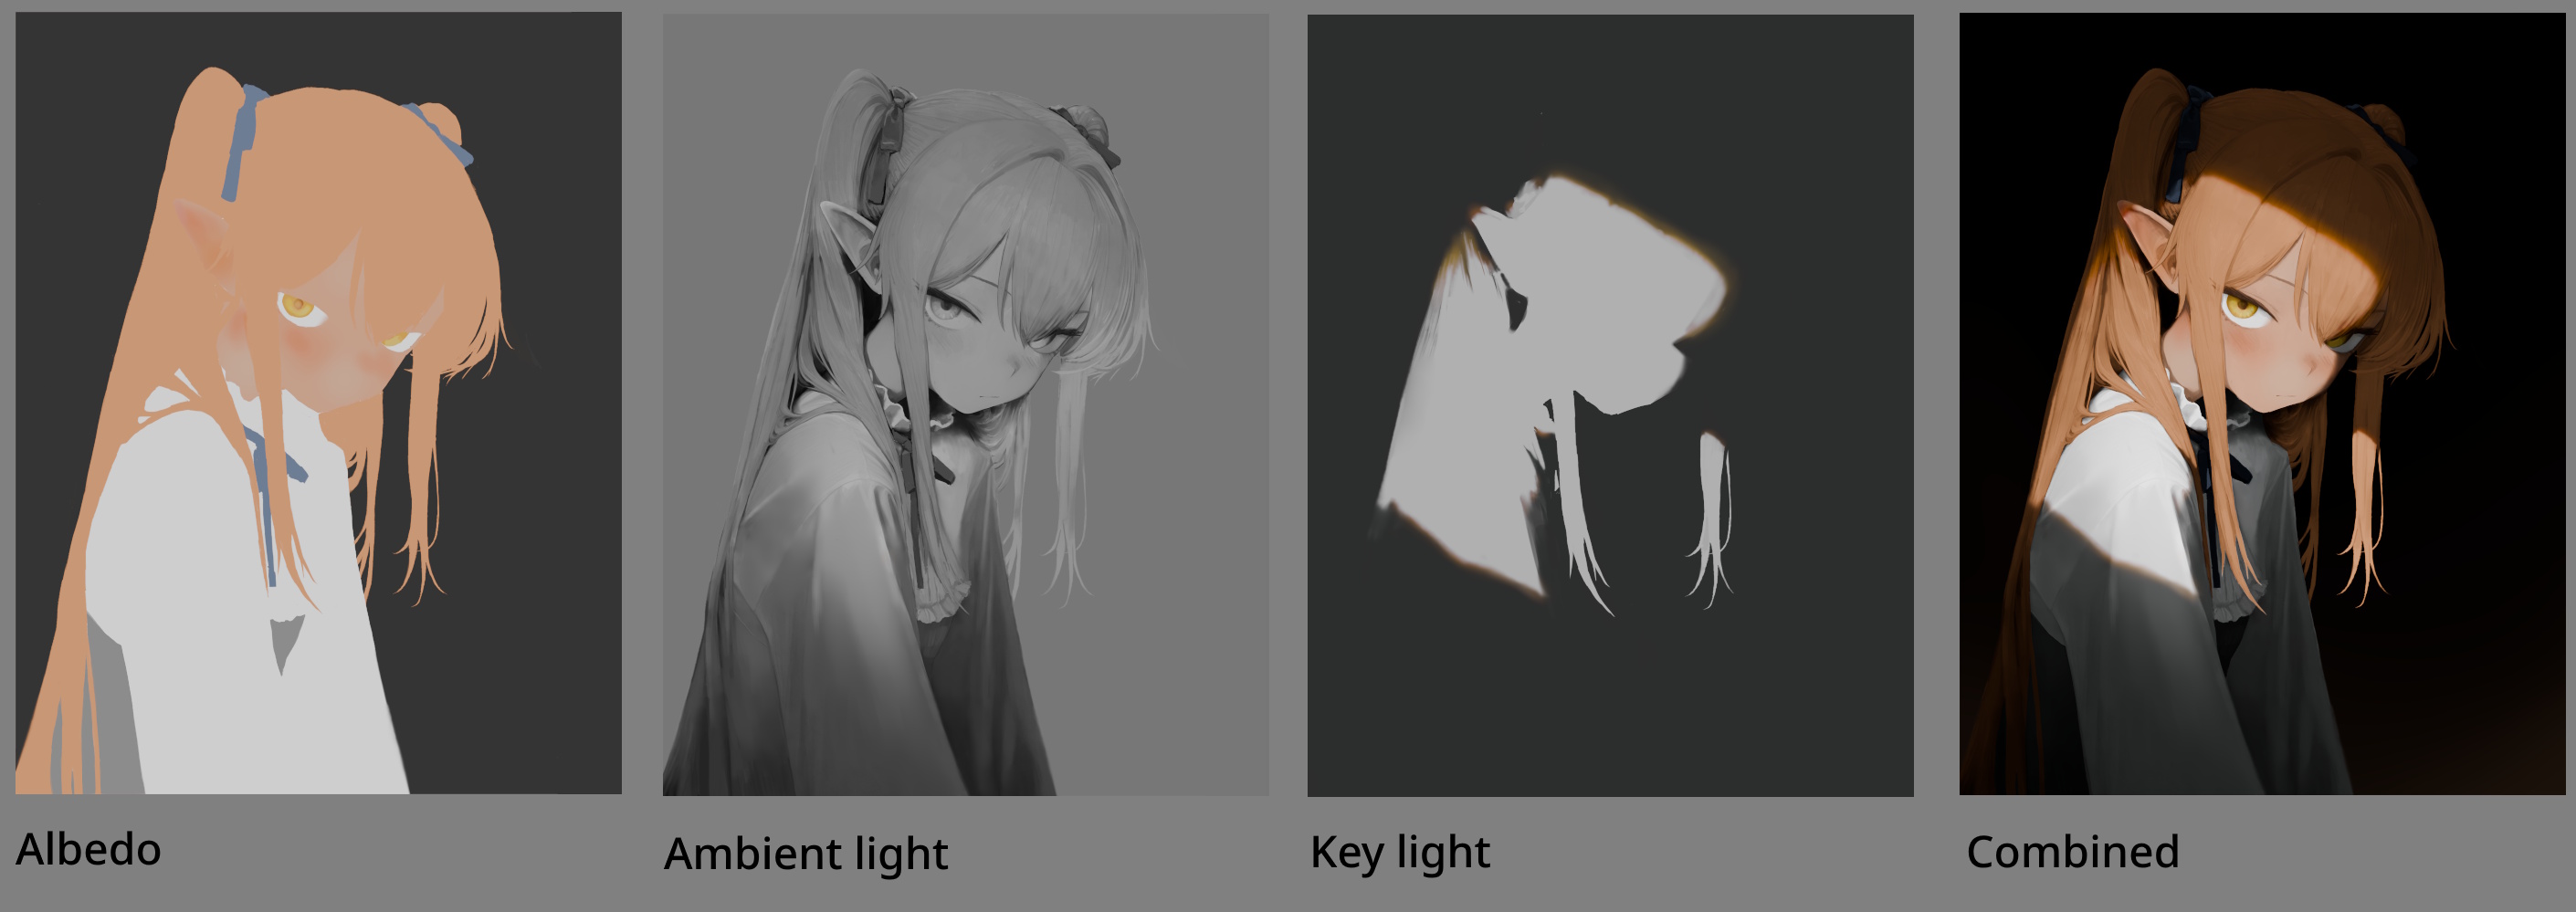
This is a simplified overview of the project, showing the local color and two main light sources. All of my albedo colors are on seperate clipping masks, which makes it really easy to play around with the colors and select different areas to work on. For the key light, I add warm tones on the edges to simulate subsurface scattering. In addition to these main light sources, I also have specular reflections for the eyes and hair, plus some subtle bounce light.
Post processing
Besides color correction and some film grain, there is a subtle bloom effect on the final image. This effect is not just there because it's pretty, it can give the illusion of a larger dynamic range than what can actually be displayed.
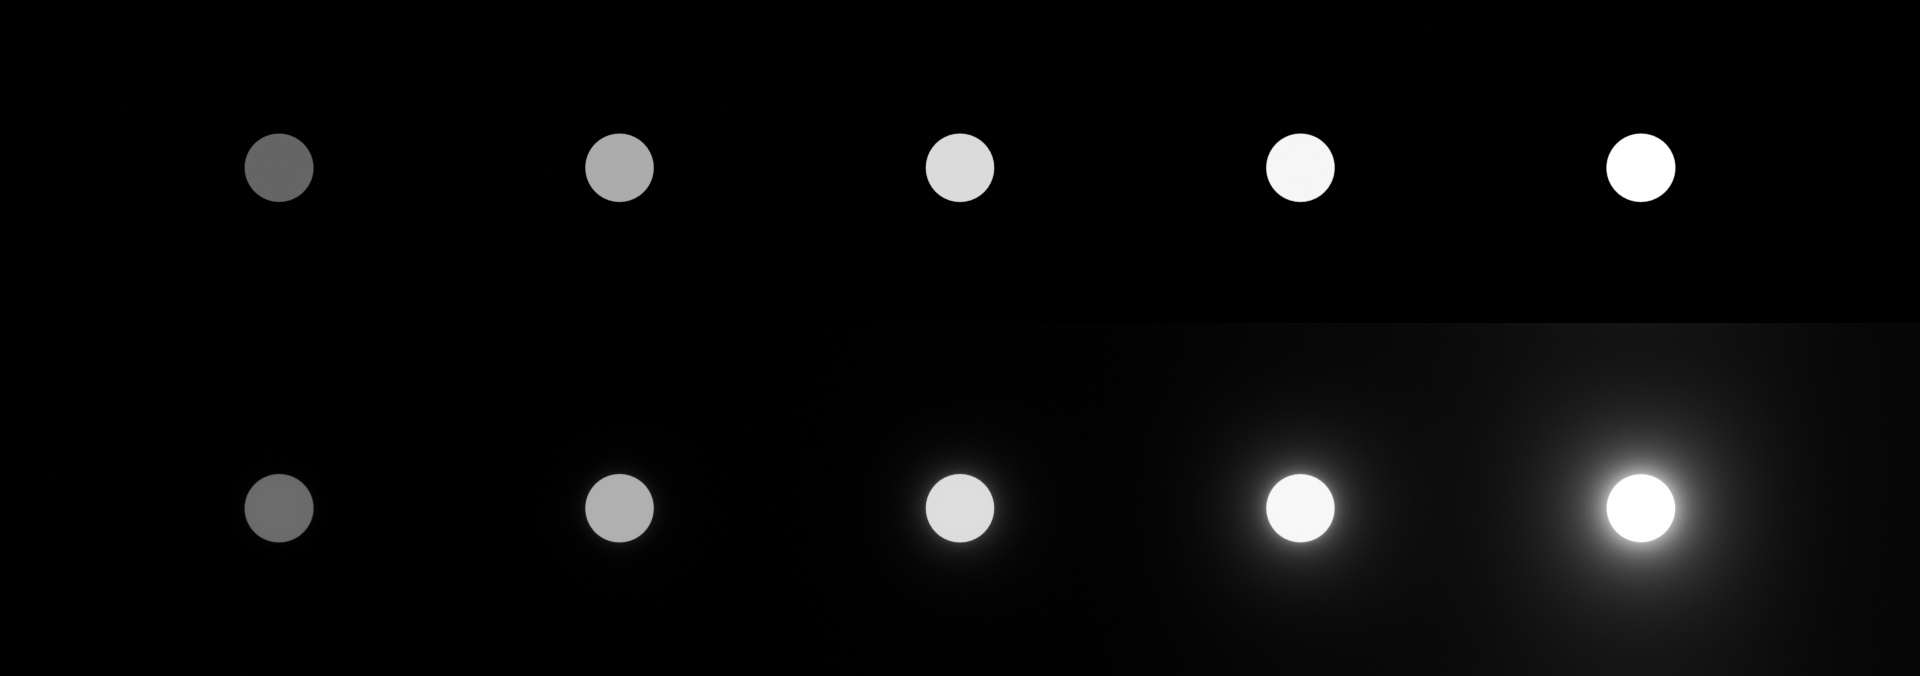
To demonstrate, here are 5 lights of increasing intensity. Without applying bloom, the last three lights look very similar. The intensity is just too high to display, so the color gets mapped to pure white. The bottom row shows the same set of lights after applying bloom. Now there is an extra visual cue that clearly shows the intensity of the light.
Setting up HDR painting in Krita
I will give some extra details here for those who want to replicate my setup. Overall it is a bit of a hassle, but I think it's worth it.
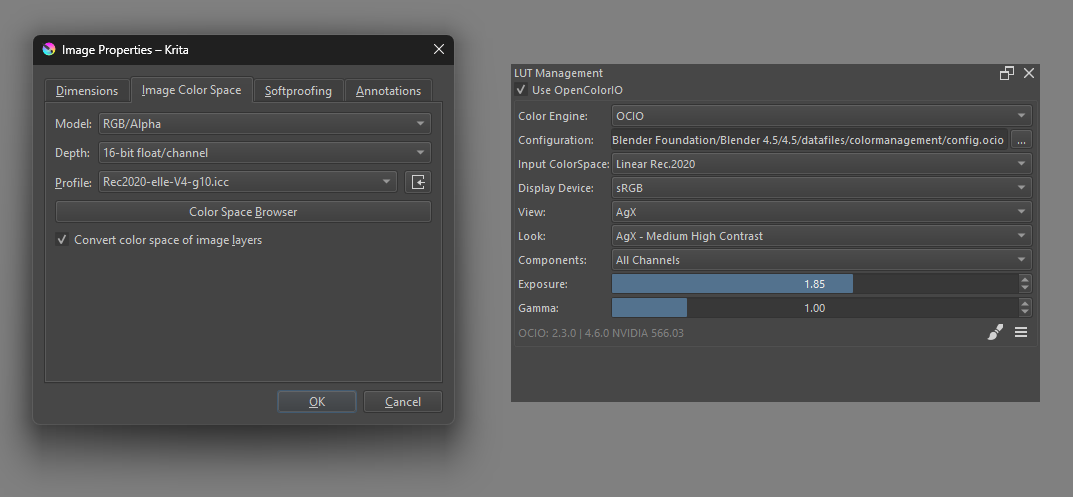
To set up HDR workflow in Krita, first set the image color space to Rec. 2020, and choose 16-bit floating point for the bit depth.
To import the AgX tonemapping, open the "LUT Management" docker and locate the OpenColorIO config file.
For me it was in C:, but this probably depends on your system.
Set the input space to Linear Rec. 2020 and display device to sRGB.
I set the look to Medium or High contrast since the default look tends to be slightly washed out. I always leave gamma at 1.
It's useful to keep this panel open while working since you will often need to change the exposure when turning lights on and off.
Unfortunately, Krita can only preview the colors, you can't actually export the image with the color management applied. To get around this, we save as EXR (a format that supports HDR) and roundtrip the image through Blender.
Post processing in Blender
We won't actually do any 3D here. You can use Blender's compositor to process files directly.
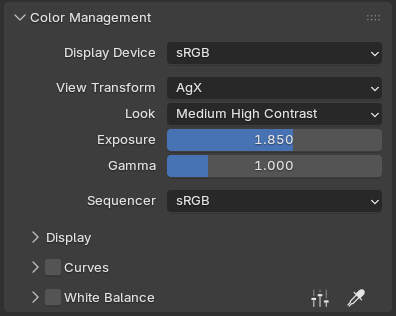
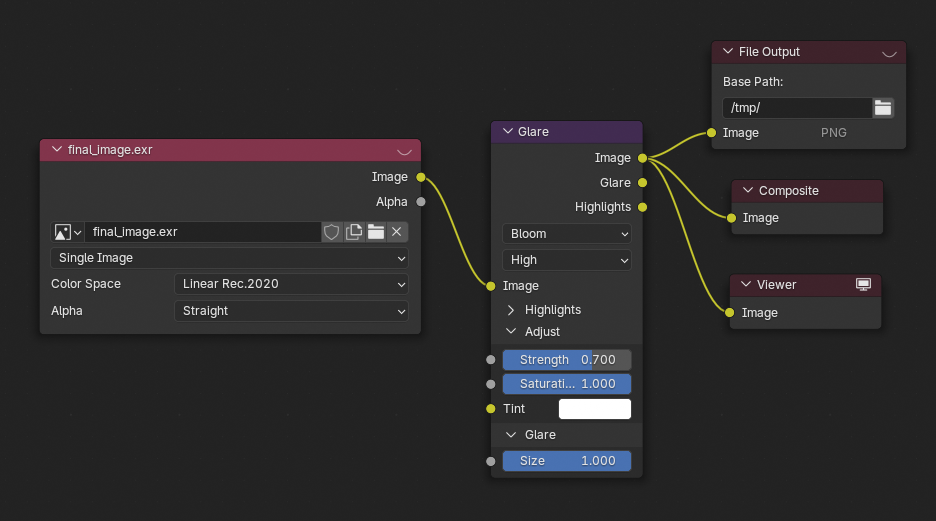
First set up the color management to match the settings in Krita. There's not much to do since AgX is the default. Then in the compositor, load the EXR file using an image load node (make sure to set color space to Linear Rec. 2020), and connect it up to the viewer. If you did things correctly, the image should look the same as it did in Krita.
From here, we can also add the glare node to add some bloom. Then use a file output node to save the result. Now we finally have a png image in the correct color space for displaying (sRGB). With this I do some final color correction and contrast adjustment.